
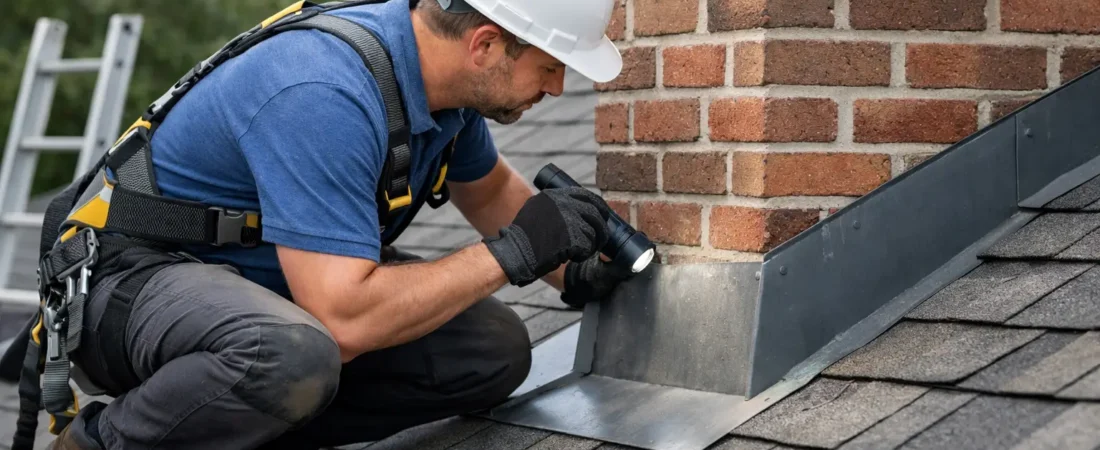
A water mark appearing beside a chimney breast after heavy rain is rarely a minor cosmetic issue. Chimneys interrupt the roof covering, creating several junctions where water must be directed safely away. Knowing how to inspect chimney flashing helps you spot visible warning signs early, but it also helps you recognise when a close-up roof assessment is the safer and more useful next step.
Chimney flashing is not one single strip of metal. It is a system of overlapping components, mortar joints, roof tiles or slates, and weatherproof seals. A fault in any part can allow water beneath the roof covering, where the source of a leak may be difficult to trace from inside the property.
Why chimney flashing deserves close attention
The flashing around a chimney has to cope with wind-driven rain, temperature changes and movement between the chimney stack and the roof. In Dublin and surrounding counties, repeated wet weather and exposed sites can accelerate wear at these vulnerable junctions.
A leak at the chimney is often intermittent. It may only become obvious during rain blowing from one direction, or after several days of persistent rainfall. By the time staining is visible internally, moisture may already have travelled along roof timbers or membranes before appearing at its final point.
For buyers, sellers and property managers, chimney flashing should be a priority risk area in a roof condition report. The visible metal may look acceptable from ground level while lifted edges, cracked mortar or defective details remain hidden at roof level.
How to inspect chimney flashing from the ground
Start with a safe visual check from ground level using binoculars or a camera with a strong zoom. Stand far enough back to see the chimney and the surrounding roof slope clearly. Do not climb onto a roof, lean a ladder against a chimney, or inspect during rain, high winds, frost or poor light.
Look at the overall shape of the flashing. It should sit neatly against the chimney and roof covering, without obvious openings, ripples or sections that appear lifted. Lead is common on many Irish roofs because it can be dressed to suit uneven surfaces, but other metals and proprietary flashing systems are also used.
Pay particular attention to the lower edge of the chimney, where water is directed around the front of the stack, and to the sides, where stepped flashing should follow the line of the tiles or slates. At the rear, a wider section known as a back gutter or saddle manages the greater volume of water flowing down the roof. This rear detail is frequently obscured from ground level, yet it is one of the most significant areas to assess.
A simple ground-level inspection can reveal useful concerns, including:
- Flashing that has visibly slipped, lifted or separated from the chimney.
- Cracked, missing or loose mortar at the flashing chase.
- Dark staining, moss build-up or debris collecting uphill of the chimney.
- Damaged, displaced or missing tiles and slates immediately beside the stack.
- Cracked chimney render, loose brickwork or an uneven chimney pot that may indicate wider weather exposure.
These observations do not confirm the cause of a leak on their own. They do, however, provide a sensible basis for arranging a specialist roof inspection before authorising repairs or relying on assurances during a sale.
Check the flashing components, not just the metal
Flashing can fail even when the lead or metal itself has no hole. The interface between components matters just as much.
The chase and pointing
The upper edge of traditional lead flashing is commonly inserted into a narrow joint cut into the chimney masonry, called a chase. This joint should be securely pointed so rain cannot track behind the metal. Crumbling mortar, open joints or sealant that has split away can create a direct route for water.
Some older repairs rely heavily on surface sealant. Sealant can be appropriate for particular details, but it is not a permanent substitute for correctly chased and dressed flashing. If broad beads of mastic are cracking, shrinking or peeling, the underlying detail merits closer examination.
Step flashing at the sides
Step flashing should overlap in stages alongside each course of tiles or slates. Its job is to shed water out on to the roof covering rather than allow it to run down the chimney wall. Gaps between the steps, poorly formed corners or exposed edges may allow wind-driven rain behind the flashing.
The quality of this detail depends on the roof material. Slate roofs, concrete tiles and flat roof junctions each need a different approach. A repair that looks tidy from a distance may still be incompatible with the roof covering or fail to provide sufficient overlap.
The front apron and rear back gutter
At the front of the chimney, the apron should lie smoothly over the roof finish and direct water on to it. It should not be so flat, short or distorted that rain can be driven beneath the edge.
The rear back gutter is a common location for concealed defects. Leaves, moss and silt can block water flow, particularly where a chimney sits on a low-pitched roof or beneath overhanging trees. Standing water increases the chance of leaks and can expose weak laps or cracks. This area should be examined from a safe access position or with appropriate drone imagery, not by reaching over from an unsecured ladder.
Signs that the issue may be urgent
Not every defect requires emergency work, but some conditions should not wait for the next maintenance cycle. Active dripping, rapidly spreading ceiling staining near the chimney, loose flashing visible in windy weather, or roof tiles displaced around the stack warrant prompt attention.
A chimney that is visibly unstable, has loose masonry, or shows a leaning pot presents a separate safety concern. Keep people clear of the area below and arrange professional advice. Roofing works near a compromised chimney may require the stack itself to be assessed before flashing repairs can proceed.
It is also worth acting quickly if a property transaction or insurance claim is involved. Photographs taken after a storm can be useful, but an independent report should clearly distinguish recent storm-related damage from deterioration, poor installation or a long-standing maintenance issue where the evidence allows.
What a professional chimney flashing inspection adds
A thorough roof inspection examines the chimney in context rather than treating flashing as an isolated patch. The inspector can assess the roof covering around the stack, drainage paths, workmanship, weathering patterns and any signs of water entry associated with the junction.
Close-range photographs and drone imagery can document areas that cannot be assessed reliably from ground level. For steep, fragile or difficult-to-access roofs, this approach improves coverage without introducing unnecessary risk. The result should be a clear record of the observed condition, the likely level of concern and practical recommendations for repair, monitoring or further investigation.
This is particularly valuable when a contractor has proposed a repair but the underlying cause is uncertain. Replacing a visible strip of flashing may not resolve a leak caused by a blocked rear gutter, defective tiles, cracked pointing higher on the stack or a poorly detailed roof junction. The correct scope of work depends on what the inspection finds.
Avoid common inspection mistakes
The most common mistake is assuming that a dry ceiling means the flashing is sound. Water can enter during specific weather conditions and remain hidden for some time. Another is treating surface sealant as proof that a repair has been completed properly. Fresh sealant may temporarily conceal open joints while leaving the water-shedding detail unresolved.
Avoid using a pressure washer around chimney flashing. High-pressure water can force moisture beneath laps and dislodge ageing mortar or tiles. Similarly, do not pull at leadwork to test whether it is secure. Lead can crease or tear, and a minor defect can become a more expensive repair.
If you are checking before buying, selling or renewing a maintenance plan, ask for dated photographs of the chimney flashing and surrounding roof area. A decision-ready roof report should identify the location of concerns precisely and explain whether the issue is urgent, repairable or best monitored over time.
A chimney flashing defect is often straightforward to repair when identified early. The useful next step is not guesswork from a damp patch, but a safe assessment that shows exactly where water is getting past the roof’s protective layers.